
First things first – we need a file to work with! Access doesn’t let you just build something and then save it, in the same way as Word or Excel do, so we need to create a blank, empty database file.
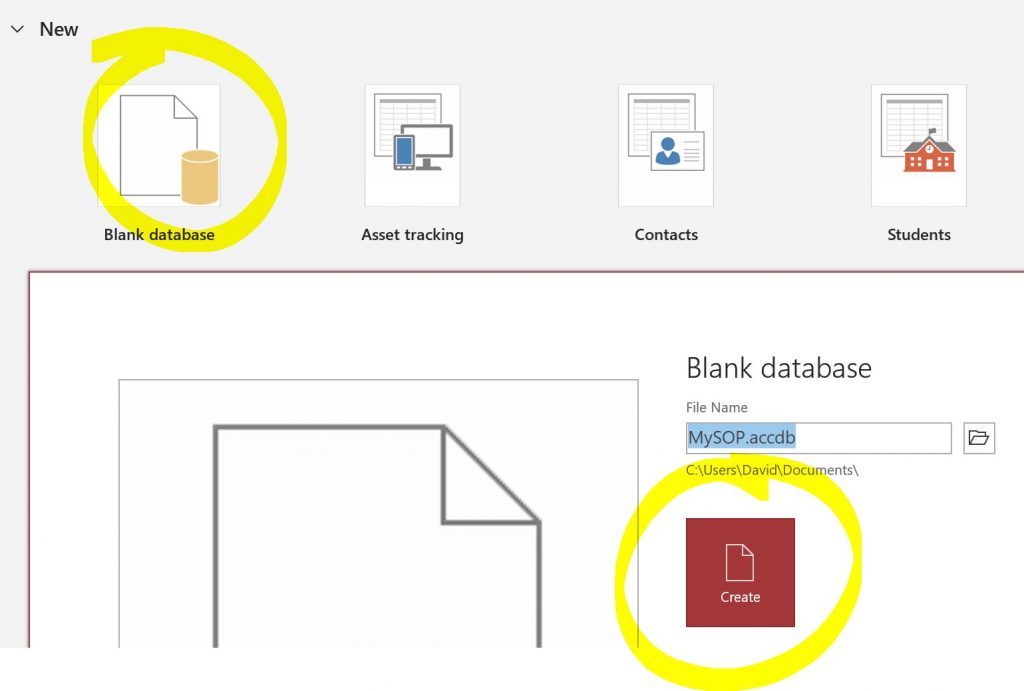
When you start Access you are offered the choice of opening a blank database or creating a file based on one of a number of templates. We’ won’t bother with those for the moment, so click Blank Database, choose a name (and navigate to a folder where you want to keep the file) and then click Create:
This has given you your new database file, and you should see a blank screen with a navigation pane to the left. it has also very helpfully set up a blank table for you, but in a way (in my opinion) that makes it quite difficult to deal with, so before you do anything we are going to change the view, by clicking the design icon at the top left. More on the toolbar in a moment, but first we need to get it out of this “helpful” table design mode! This is the icon to click:

As soon as you click it, you will be asked for a table name – choose “tblCustomer” for the time being, and click OK, and the whole screen layout will change and you will see what I think is a far more intuitive way of building a table.
Let’s build that first table!
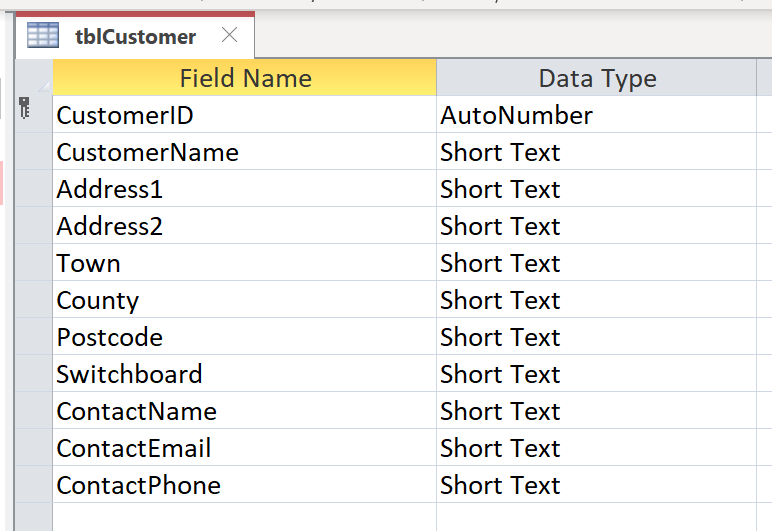
Excellent, let’s do that. I’m going to go into a bit of techie detail about data types and so on in the next post, but for the moment, just concentrate on the table designer, where there is a column for a field name, and a column for a data type. You already have a default field called ID, with a type of Autonumber, so change the name of that to “CustomerID”, and then in the blank rows below, add the following fields, in every case with the data type of Short Text. The data type can be selected from a dropdown option when you click on the relevant row, and enter the names as shown with no spaces:
CustomerName
Address1
Address2
Town
County
Postcode
Switchboard
ContactName
ContactEmail
ContactPhone
All being well, you should now have a table looking like this:
Before we put any data into our new table, time for some more basic principles, so back to the top and move to the next post in the series …