
Visual Basic for Applications (VBA) is a relatively straightforward and inuititive programming language that is, nonetheless, powerful and incredibly useful.
Most Office and Excel users have heard of a macro – this is a program which will automate an action, often based on you recording a series of menu selections and keystrokes. This makes them very easy to create and use for non-programmers, but behind the user interface they are written in VBA (in Microsoft Office applications at least).
This is where I might fall out with some other developers and perhaps even with you, dear reader!
I don’t actually like the automated process of creating macros enormously – it can be quite difficult to see what is going on, so I am a bit old-fashioned, and prefer to write the code, so I can read it and see what’s going on. You can view the code behind a macro, of course, but to my mind it isn’t as easy.
However, we will cover it all, and you can see what your own preference might be!
Where are all the bits I need?
You can record a macro using the Macros section on the View ribbon in Excel – it’s the option at the very right-hand end on my version:

You’ll see that there are three options if you click the little arrow underneath the icon – View Macros, Record Macro, and Use Relative References. We’ll ignore the last one for the moment (don’t click it!) and crack on and examine the process of creating a very simple macro.
My first macro
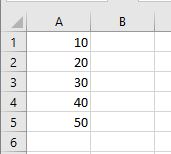
First of all, take your blank workbook and put some random numbers in the first five rows of column A. It doesn’t matter what they are. Then click on a cell somewhere else in the workbook – again, it doesn’t matter where. You should have something like this:
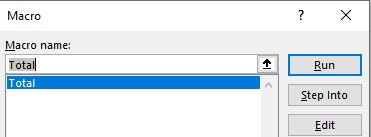
On the View ribbon shown above click the down arrow beneath the Macro icon and choose “Record Macro”, and a popup will appear. Enter the name “Total” for your macro, then click OK, and perform the following actions:
- Click on cell A6, beneath the column of random numbers you have entered
- Click “Alt =” (press and hold the Alt key and hit the equals sign – this will add an AutoSum total in the cell)
- Click the Tab key, which will move out of the total cell and into B6
- In B6 type the word “Total”
- Click cell B1 to move the highlight to that location
- On the Developer toolbar, click the Stop Recording option
That’s it – you have recorded your first macro! Now clear cells A6 and B6 to remove the formula and text that you just entered, so you can test your macro.
To run it, click the Macros button on the Developer toolbar, and you should see it in the list – highlight it and click “Run”:
All being well, you should see the autosum total appear in cell A6, and the word “Total” appear in cell B6. You have just successfully recorded a macro!
I mentioned above the third option on the Macro menu – Use Relative References. We’ll take a look at what that means in the next post in this series here.